Want to build your very own remote-controlled plane without spending a fortune? Making an RC plane out of cardboard is a fun, affordable way to get started with model aircraft.
You don’t need fancy materials or expensive tools—just some cardboard, basic electronics, and a bit of patience. In this guide, you’ll discover easy step-by-step instructions that anyone can follow, whether it’s your first time or you’re looking to try something new.
Ready to take off and see your creation soar? Keep reading, and let’s get your cardboard RC plane flying!
You May Like
No products found.
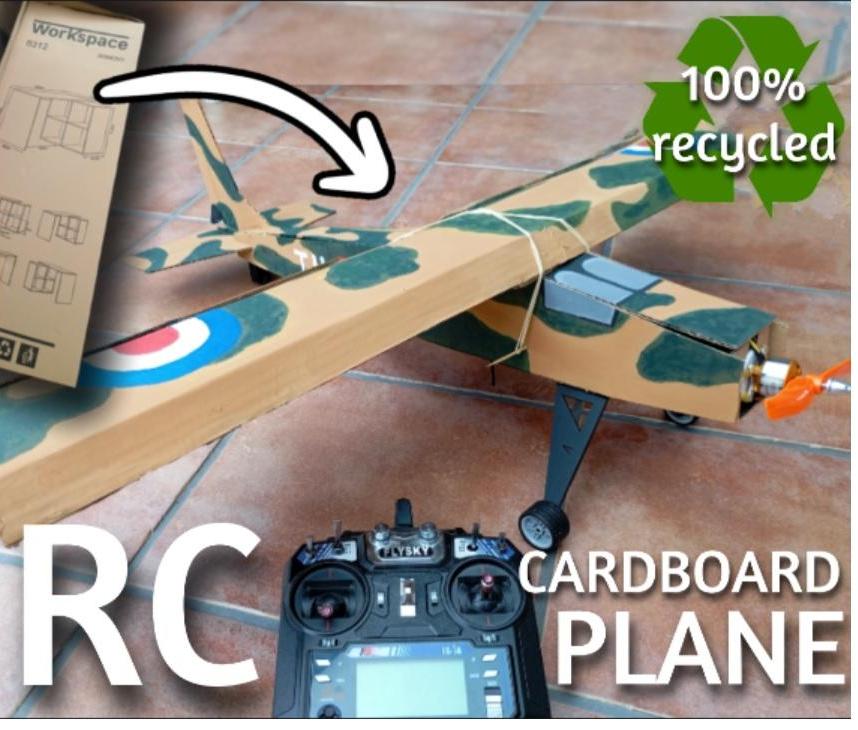
Credit: www.instructables.com
Materials Needed
Building an RC plane from cardboard is a fun and creative project. Gathering the right materials is the first step. Proper materials ensure your plane is sturdy and flies well. Here is a list of all the necessary items you will need to start your build.
Choosing Cardboard
Select strong, lightweight cardboard for your plane. Corrugated cardboard works best for durability. Avoid thick or heavy cardboard that adds weight. Flatten large cardboard pieces for easier cutting and shaping. Recycled boxes can be a good source of materials. Make sure the cardboard is dry and free from tears or dents.
Essential Electronics
You need a small electric motor to power the plane. Get a propeller that fits the motor size. A lightweight battery, like a LiPo, is necessary for flight power. Include a receiver to control the plane remotely. Use servos to move the control surfaces. A transmitter will send signals to the plane. Ensure all electronics are compatible and lightweight.
Additional Tools
Gather cutting tools like a craft knife or scissors. Use a ruler or measuring tape for precise cuts. Have glue or tape to assemble parts securely. Sandpaper helps smooth cardboard edges. A marker or pencil is useful for marking cut lines. Small screwdrivers may be needed for electronics assembly. Keep a work surface clean and organized for best results.
Designing Your Plane
Designing your RC plane is a key step in building a successful model. This phase sets the foundation for how your plane will fly and perform. Careful planning helps avoid common mistakes and improves flight stability. Focus on simple shapes and balanced parts for the best results. Keep your design clear and easy to build with cardboard materials.
Basic Plane Structure
Start with a simple frame that supports all parts of the plane. Use cardboard strips to create the fuselage, which is the main body. Make it long enough to hold the motor, battery, and controls. Keep the structure light but strong. Reinforce weak spots with extra cardboard layers or tape. A sturdy frame makes the plane more durable during flights.
Wing And Tail Shape
Shape the wings to provide lift and control. Flat wings work well for beginners because they are easier to make. Cut the wings wide enough to carry the plane’s weight. The tail includes a horizontal stabilizer and a vertical fin. These parts help keep the plane steady and guide its direction. Use straight, simple shapes for easy cutting and assembly.
Weight And Balance
Balance is crucial for smooth flying. Place heavier parts like the motor and battery near the center. This spot is the plane’s center of gravity. Test balance by gently resting the plane on your finger at this point. Adjust weight by adding small cardboard pieces or tape to the front or back. Proper balance stops the plane from tipping or spinning out of control.
Cutting And Shaping
Cutting and shaping are key steps in building an RC plane from cardboard. These steps define your plane’s structure and flight ability. Accurate cuts and smooth shapes help the plane fly better and last longer. Take your time and work carefully to get good results.
Marking The Cardboard
Start by drawing clear outlines on the cardboard. Use a pencil and ruler for straight lines. Mark all parts like wings, fuselage, and tail. Double-check measurements to avoid mistakes. Clear marks guide your cutting and keep parts consistent.
Cutting Techniques
Use a sharp craft knife or box cutter for clean cuts. Cut slowly and follow the lines exactly. Score thick cardboard lightly first, then cut through. Avoid tearing the edges to keep shapes neat. Always cut on a safe surface and protect your hands.
Reinforcing Key Parts
Strengthen important areas like wing joints and the fuselage base. Add extra cardboard layers or tape to these spots. Reinforcement prevents bending and breaks during flight. Use glue or hot glue for firm attachment. Strong parts improve flight stability and durability.
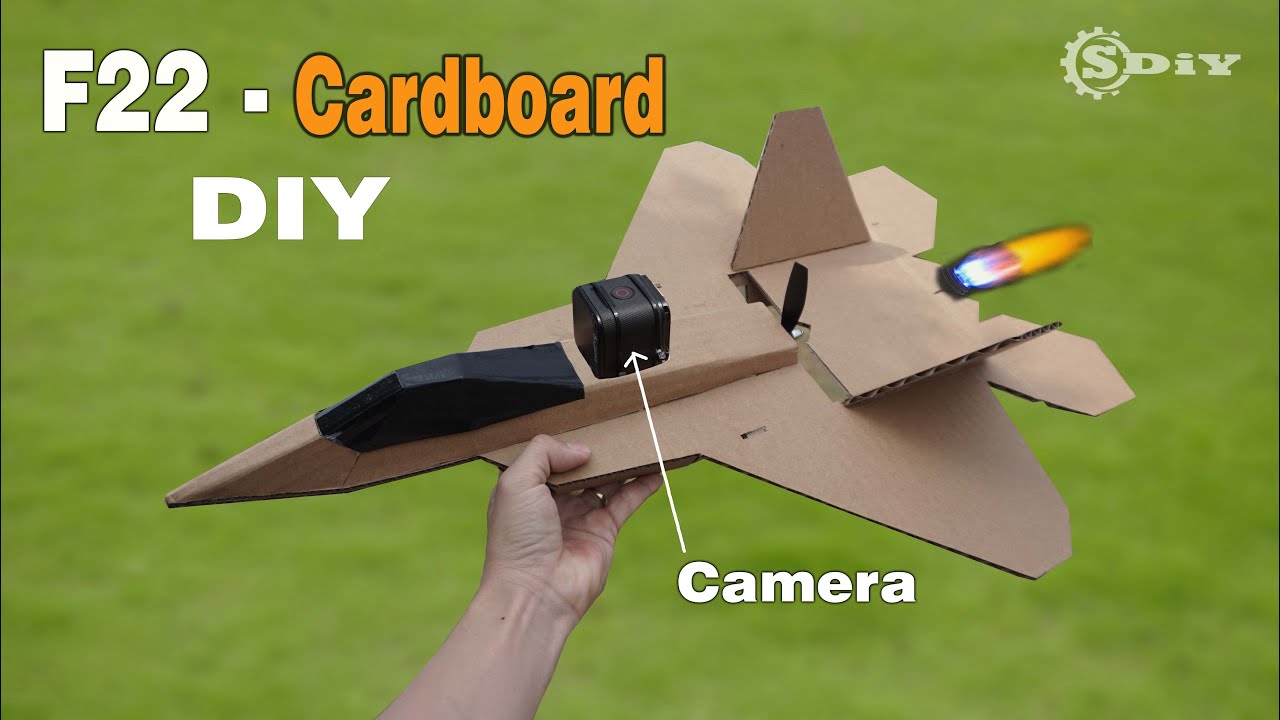
Credit: www.youtube.com
Assembling The Frame
Building the frame is the key step in creating your cardboard RC plane. This part shapes the entire aircraft and makes it strong. Pay attention to each piece and join them carefully. A good frame means better flight and durability.
Joining Fuselage Pieces
Start by aligning the fuselage parts on a flat surface. Use a strong glue or tape to hold the pieces together. Press firmly and let the glue dry completely. Make sure the edges meet evenly to avoid weak spots. Check for any gaps and fill them with extra glue if needed.
Attaching Wings And Tail
Attach the wings to the middle of the fuselage. Use glue or tape on the contact areas. Hold the wings steady until they stick well. Next, fix the tail parts: the vertical and horizontal stabilizers. They help with balance and control during flight. Make sure these parts are straight and secure.
Securing Reinforcements
Reinforce the frame by adding extra cardboard strips along the joints. These strips add strength and reduce bending. Attach them on both sides of the wings and fuselage. Use plenty of glue or tape for a tight fit. Reinforcements prevent damage during takeoff and landing.
Installing Electronics
Installing the electronics is a key step in building your cardboard RC plane. This stage brings your model to life and controls its movements. Proper placement and connection of parts ensure smooth flying and good response. Follow simple steps to mount the motor, connect servos, and set up the receiver. Clear wiring and secure attachments help avoid issues during flight.
Mounting The Motor
Choose a strong spot at the front of the plane for the motor. Use glue or tape to fix the motor mount firmly to the cardboard. Make sure the motor shaft points straight forward. This position helps the propeller push the plane efficiently. Check that the motor does not touch other parts. Leave space for wires to connect easily.
Connecting Servos
Servos control the plane’s rudder and elevator. Attach each servo to its control surface using small horns or rods. Secure servos inside the body near their linkages. Use double-sided tape or glue to hold them in place. Connect servo wires to the receiver channel ports. Keep wires tidy to avoid tangling or damage.
Setting Up Receiver
Place the receiver where it stays safe and dry inside the plane. Avoid areas near the motor to reduce interference. Connect the motor speed controller and servos to the receiver ports. Match each connection to the correct channel for proper control. Check battery connections and test signals before closing the plane’s body. This step ensures your plane responds to the transmitter commands.

Credit: www.instructables.com
Final Assembly
The final assembly is the most exciting step in making your RC plane out of cardboard. This stage brings all parts together to form a flying model. Careful attention here ensures your plane flies smoothly and responds well to controls.
Follow each step carefully to avoid mistakes. The plane’s control surfaces, balance, and movement tests are crucial. These steps make your plane ready for flight and improve its performance.
Adding Control Surfaces
Start by attaching the ailerons, elevator, and rudder to the wings and tail. Use tape or glue to secure them but ensure they can move freely. Connect the control surfaces to the servo motors with thin rods or strings. This setup lets you control the plane’s direction and altitude.
Balancing The Plane
Place the plane on your fingers at the center of gravity point. The plane should balance horizontally without tipping. Add small weights to the nose or tail if needed. Proper balance helps the plane stay stable and fly straight.
Testing Movements
Turn on the transmitter and receiver to test control surface movements. Move the controls to check if the surfaces respond correctly. Make sure the ailerons, elevator, and rudder move smoothly. Adjust the servo linkages if any surface moves in the wrong direction or not enough.
Setting Up The Transmitter
Setting up the transmitter is a key step before flying your cardboard RC plane. It connects you to the receiver inside the plane. This setup allows you to control the plane’s movements remotely. Proper setup ensures smooth flight and quick response to your commands.
Binding Receiver
Start by turning off both the transmitter and the receiver. Press the bind button on the receiver. Then, switch on the transmitter while holding its bind button. Lights on both devices will flash, showing they are linking. When lights stay solid, binding is complete. This connection lets your transmitter control the receiver in the plane.
Configuring Controls
Set up the transmitter’s controls to match your plane’s functions. Assign throttle, aileron, elevator, and rudder to the right sticks or switches. Test each control by moving the sticks. Make sure the servos in the plane respond correctly. Adjust the settings if controls are reversed or not moving as expected. Correct control setup helps in precise flying.
Range Testing
Range testing checks the transmitter’s signal strength. Walk away from the plane slowly while moving the controls. Watch for any delay or loss in response. Stop if the plane’s controls stop working properly. This test ensures your transmitter works well at flying distance. Good range means safer and more reliable flights.
Pre-flight Checks
Before taking your cardboard RC plane for its first flight, performing thorough pre-flight checks is essential. These checks ensure your plane flies smoothly and responds well to controls. A safe and fun flight begins with careful inspection and testing.
Center Of Gravity
Check the plane’s center of gravity (CG) by balancing it on your finger. The CG should be slightly ahead of the wing’s midpoint. If it is too far back, the plane may stall or spin. Adjust by adding small weights inside the nose or tail. Proper CG helps your plane stay stable in the air.
Control Surface Response
Test all control surfaces like the rudder, elevator, and ailerons. Move the transmitter sticks and watch if the surfaces move smoothly and fully. They must respond quickly and accurately. Loose or stuck surfaces can cause poor control or crashes. Tighten or fix any issues before flight.
Battery And Motor Test
Check the battery charge level to avoid power loss mid-flight. Connect the battery and turn on the motor. Make sure the motor spins freely and at the correct speed. Listen for any strange noises or vibrations. Replace or recharge the battery if needed. A healthy motor and battery guarantee strong flight performance.
Flying Tips
Flying your RC plane made of cardboard can be exciting and fun. Knowing how to fly it well helps you enjoy every flight. Use simple tips to improve control and keep the plane safe. Practice often to get better and understand your plane’s behavior.
Choosing Flying Conditions
Pick a clear day with little or no wind. Calm weather helps the cardboard plane stay steady. Avoid flying near trees, buildings, or power lines. Open spaces give room to maneuver and reduce crash risks. Fly during daylight for better visibility.
Basic Maneuvers
Start with gentle turns and slow speed. Keep the plane level and steady. Practice smooth climbs and descents to learn control. Use small, slow movements on the controls. Gradually try circles and figure-eights to improve skills.
Handling Common Issues
If the plane wobbles, check the balance and center of gravity. Tighten any loose parts on the plane. Use trimming controls to adjust flight path. For crashes, inspect damage and fix tears or bends. Replace or adjust the propeller if it stops spinning well.
Frequently Asked Questions
Can You Make An Rc Plane Out Of Cardboard?
Yes, you can make an RC plane out of cardboard. It is lightweight, easy to shape, and suitable for beginners. Use sturdy cardboard, attach motors and controls properly, and balance the plane for stable flight. Cardboard RC planes are affordable and fun DIY projects.
How To Make A Cardboard Plane Easy Step By Step?
Fold a rectangular cardboard piece in half lengthwise. Cut wings and tail shapes. Attach wings to the body. Add a nose cone. Decorate as desired. Your easy cardboard plane is ready to fly.
What Is The Simplest Plane?
The simplest plane is the Monospinner, featuring only one moving part—a propeller—making it mechanically minimal and easy to control.
Is It Legal To Make A Homemade Plane?
Building a homemade plane is legal if it meets aviation regulations and obtains proper certifications. Always check local laws and FAA rules before flying.
Conclusion
Building an RC plane from cardboard is fun and rewarding. It teaches basic aerodynamics and crafting skills. Using simple materials keeps the project affordable and easy. Follow each step carefully for the best results. Testing your plane helps improve its flight performance.
Enjoy the process and learn from each attempt. Soon, you will have a flying cardboard RC plane to show off. Keep experimenting and have fun with your new hobby!